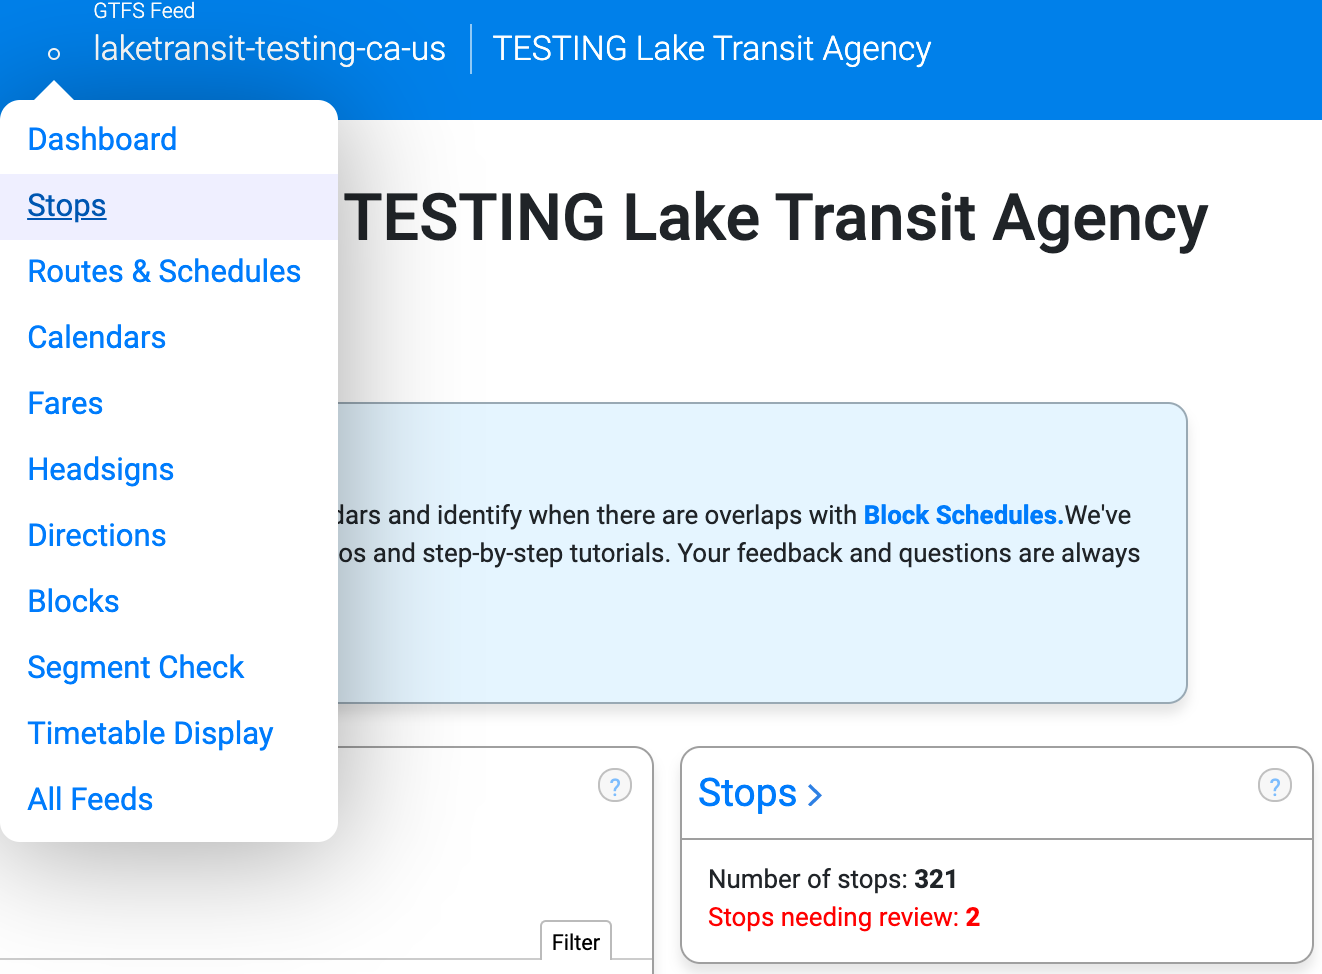
GTFS Manager allows you to create a new Stop several different ways. First, navigate to the Stop inventory using either the drop down menu in the top banner, or the link on the dashboard page.
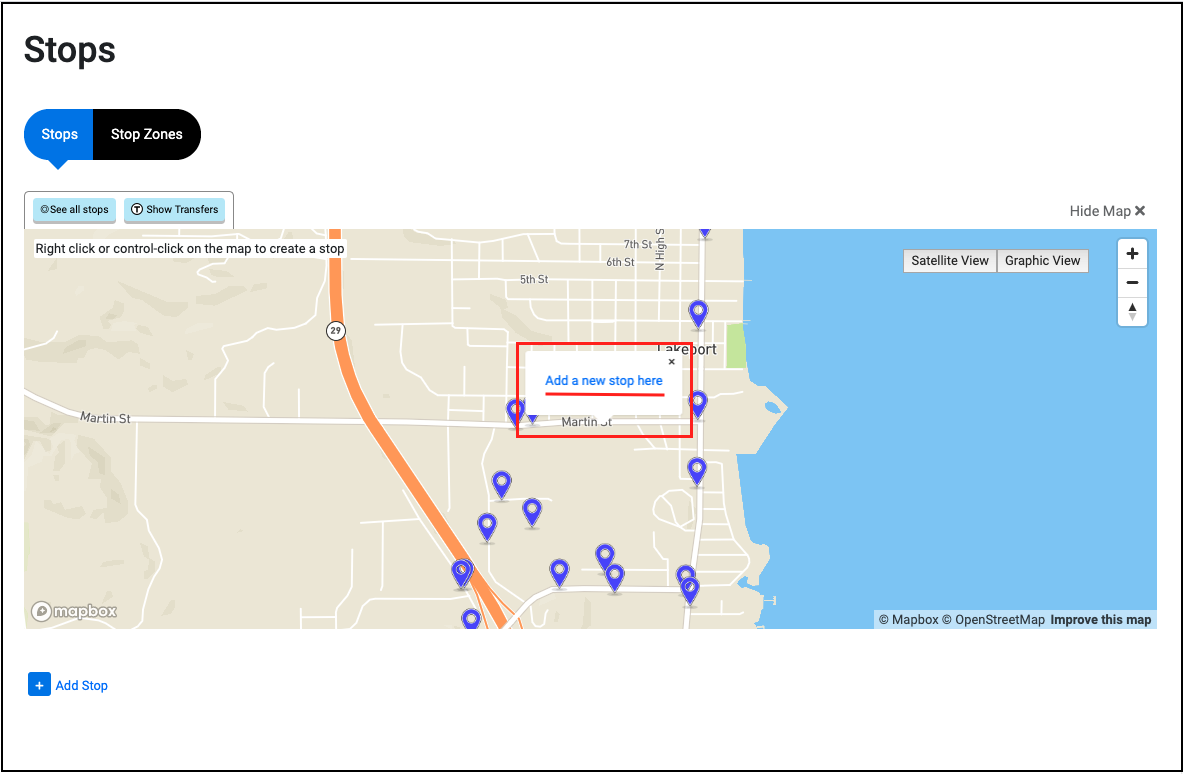
From the Stop page there are two methods to create a new stop.
- Right click on the map at the location you would like to place your Stop. You may wish to zoom in or switch to Satellite View to ensure accuracy. Select Add a new stop here from the dialogue box when ready to create the stop.
- Left click on the Add Stop button beneath the map. This allows you to either search for an address or landmark, or enter a pair of latitude and longitude coordinates. Click Go to Stop Details when ready to create the Stop.
Now you are at the Stops Details page. All Stops must have a name. All other empty fields are optional. GTFS Manager will fill in the latitude and longitude if you used the map to create the stop, and each new stop is defined as a single stop instead of a station.
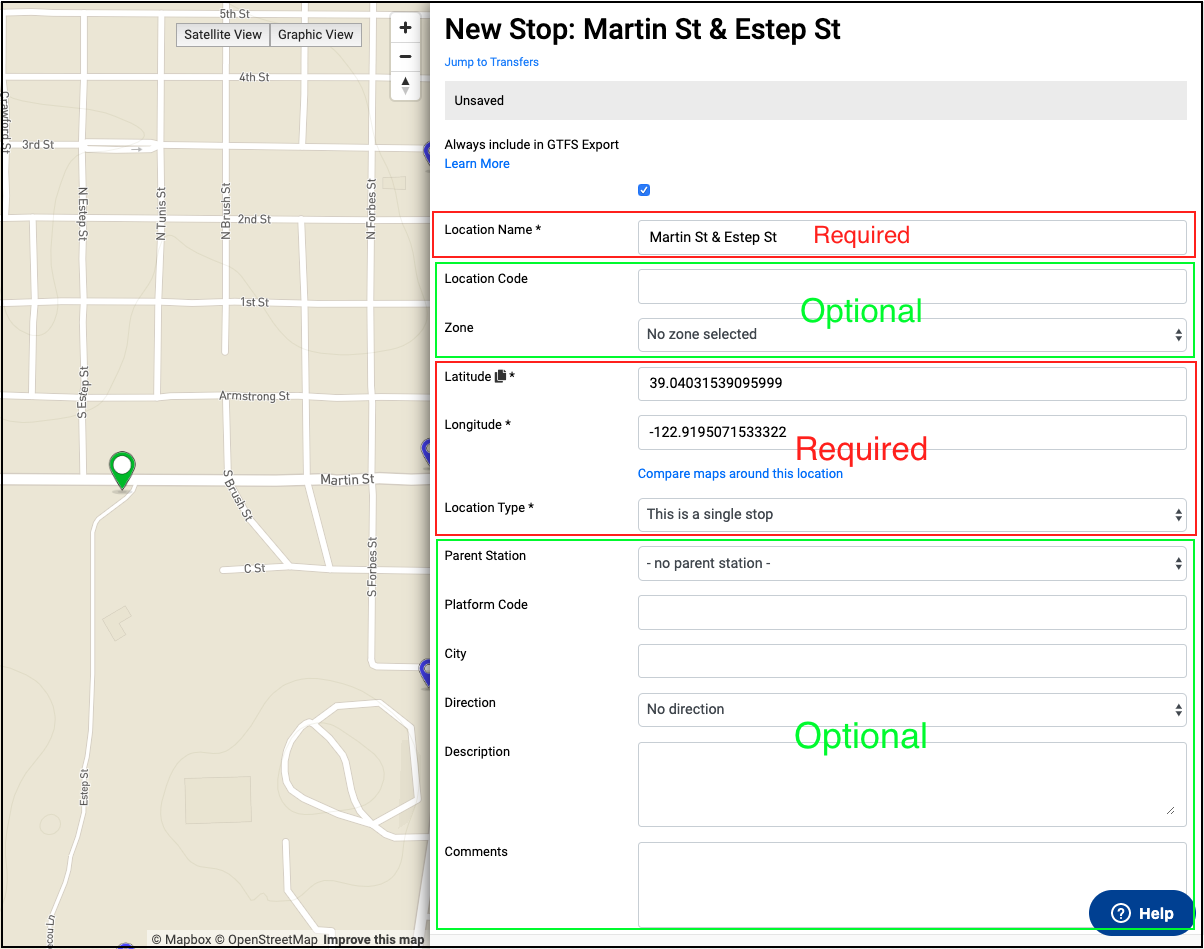
The table below contains information and best practices for each of the available fields in the Stops Detail page.
| Field |
Best Practice |
Required? |
Learn More |
| Location Name |
- Recognizable landmarks
- Street intersections
- First street name is the street the stop is ON. Second street name is the intersecting street;
- Same abbreviations (if used) for all street types (eg, Ave);
- Same conjunctions (& OR and; @ OR at.)
- Matches what is posted on website and timetables
|
Yes |
GTFS.org |
| Location Code |
- Also known as "stop code," this is a customer-facing alphanumeric code that is usually associated with AVL/realtime arrival information.
- *If you have location codes exporting as stop id, such as for a real-time integration, you must include a location code in order to save.
|
No*
|
|
| Zone |
- Used with zone-based Fares. Zones must be created in Stop Zones.
|
No
|
Fare Zones
|
| Latitude, Longitude |
- Should be as exact as possible.
- Place stops on curbs and sidewalks where a rider should stand, not in the street or middle of intersections.
- For intersections with multiple service directions (eg, inbound and outbound, South and East) create a separate stop for each direction.
|
Yes
|
GTFS.org
|
| Location Type |
- Default is "Single Stop." See "Stations" for more details about creating a station with platforms and entrances.
|
Yes
|
Stations |
| Parent Station |
- See "Stations" for more details about creating a station with platforms and entrances.
|
No
|
Stations |
| Platform Code |
- See "Stations" for more details about creating a station with platforms and entrances.
|
No
|
Stations |
| City |
- Internal-facing field for organizing stops based on cities. Useful for GTFS with zone-based Fares and sorting stops by city.
|
No
|
|
| Direction |
- Internal-facing field for organizing stops by direction. See "Directions" for more information.
|
No
|
Directions |
| Description |
- This field should be left blank and can not convey information to riders at this time. Use "Comments" for internal notes about a Stop.
|
No
|
|
| Comments |
- Text field for internal notes about a Stop.
|
No
|
|
| URL |
- Customer-facing URL for this specific stop. Often associated with single-stop pages linked to AVL/realtime information.
|
No
|
|
| Wheelchair Boarding |
- Customer-facing value. Should only be used if values available for all stops in the system.
|
No
|
|
Transfers
Transfers allow definition of transfer points between Routes at either a single Stop or pair of Stops.
Learn More:
- Transfers
Once you have entered the desired information, click Save at the bottom of the Stop Details page and the new Stop will be added to your system. This Stop can now be added to any Route.
Learn More:
-
Edit a Stop
-
Delete a Stop
-
Stop Patterns
-
Flag Stops and On Demand Stops

Comments
0 comments
Please sign in to leave a comment.